Blog
Ergonomics in the Dental Office
How to Care for Patients While Also Caring for Yourself
Picture the most recent clinical procedure you performed. Are you leaning over the patient or is your back erect? Are you craning your head to get a better view or is your neck relatively straight? Are your hands twisted around or are your wrists level?
It is not uncommon for dental professionals to find themselves straining in awkward positions repeatedly throughout the day while delivering care to their patients. Unfortunately, this also puts practitioners at a high risk of musculoskeletal problems, including back pain, repetitive motion injuries, carpal tunnel syndrome, and more.
There’s a real cost to this pain, too. RDH Magazine reports that millions of dollars in income are lost every year when dentists must cancel patient appointments because the pain prevents them from working.
The solution to this pervasive challenge is ergonomics: the science of fitting the work to the worker, so the worker doesn’t need to strain to perform the work. Sounds straightforward, right? In dentistry, though, this often means rethinking the basic techniques dental professionals use every day when delivering patient care.
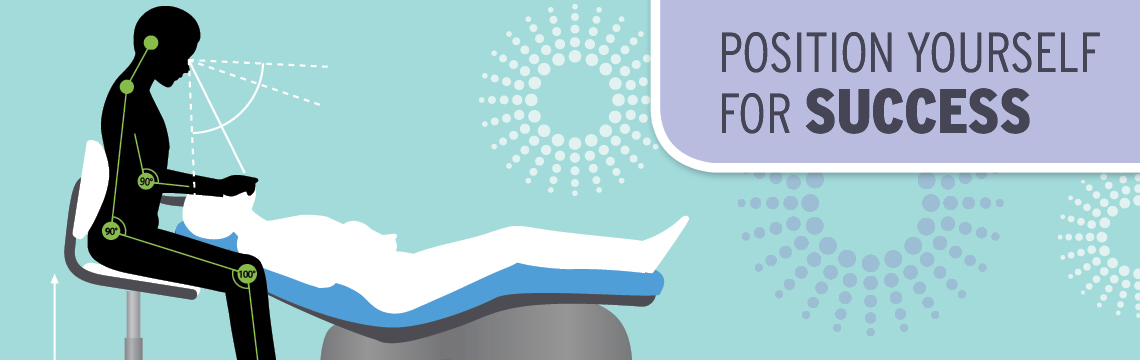
Proper posture for dental professionals
Ergonomics in dentistry starts with maintaining the body in a neutral position as much as possible. This means dental professionals should try to:
- Maintain an erect posture, rather than bending forward or leaning over the patient.
- Sit, rather than stand, for all clinical procedures.
- Work as close to the patient as possible to minimize the need to overextend the arms or back.
- Keep feet flat on the floor or on the footrest of the stool. Adjust the stool height so the thighs slope slightly downward.
- Evenly distribute weight in a tripod pattern, through each foot on the floor and the buttocks.
- Consider using a loupe to minimize the need to perch on the edge of the stool to see into the intraoral cavity.
- Hold wrists in a neutral position and minimize excessive wrist movements.
- Avoid gripping instruments too tightly.
The clinician should always try to face the patient directly during treatment. To maintain a direct view into the oral cavity, ask the patient to turn their head as needed and use mirrors to improve visibility. Hold handpieces and instruments at roughly arm level and keep instruments within a 21-inch radius of the assistant to minimize the need to reach or turn. The overhead light should be positioned slightly behind and to one side of the clinician’s head to minimize shadows. A lightweight head-mounted light can also be an ergonomically friendly lighting alternative.
Proper patient positioning
Ideally, the patient will be in a supine position for clinical procedures; a contoured cervical support cushion can improve the patient’s tolerance for reclining. In RDH Magazine, physical therapist and dental ergonomic consultant Bethany Valachi recommends placing the patient chair back at a 10- to 15-degree angle from the floor. She also suggests asking the patient to scoot to the end of the headrest to eliminate the need for the clinician to lean over the empty space on the headrest.
When treating the upper arch, the occlusal plane should be tilted 15 to 20 degrees from the vertical plane, while when treating the lower arch, the occlusal plane should be tilted about 30 degrees from the horizontal plane. The patient chair should be adjusted so the forearms are parallel to the floor or sloping 10 degrees upward.
Proper Instrumentation
Ergonomics should also be a key factor when selecting dental instruments. Lighter, larger-diameter instruments, particularly those with a textured grip surface, are easier to grasp and can reduce the amount of force needed during probing, scaling, and root planing.
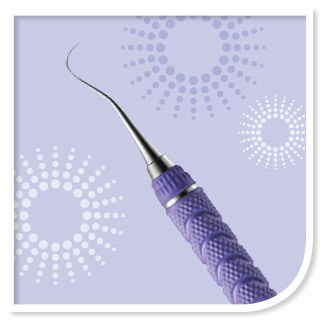
Additionally, maintaining dental instruments with sharp working edges is critical for reducing hand fatigue. Instruments that are not properly sharpened will require the operator to apply more force to achieve the same result, which can increase both working time and patient discomfort. If sharpening by hand, it’s essential to utilize the right sharpening tools and appropriate technique to avoid hand fatigue and ensure proper instrument maintenance. Of course, a professional sharpening service is always an option too.
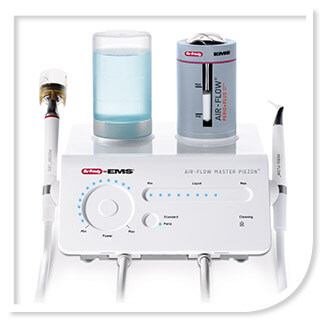
Another important tactic for improving ergonomics is establishing a replicable process for treating patients that incorporates a variety of techniques. Guided Biofilm Therapy, for instance, advocates using a combination of AIRFLOW® and hand scaling (among other steps) as a comprehensive approach to preventive care. This not only provides a higher standard of care but also significantly reduces hand stress by incorporating power techniques with hand scaling.
Ultimately, though, these suggestions are just the tip of the iceberg, and other considerations may come into play when improving the ergonomics of the average dental practice. For example, most dental equipment was developed with the average male dentist in mind, which may put female dentists with smaller builds at a disadvantage.
This highlights the very nature of ergonomics: the one-size-fits-all just doesn’t work. It’s therefore important to consider your unique needs and work environment in order to design a workspace that promotes optimal wellbeing. There are many different ways to provide a complete standard of care to patients, and the trick is finding the right approaches that allow you to perform at your best every day.
This may take some trial and error but stick with it. Even small changes can have a big impact as you continue to perform at your best.