Blog
Follow These Critical Guidelines for Proper Sterilization
Ensure Infection Prevention and Avoid Innocent Mistakes with a Refresher on the Sterilization Process
The sterilizer is a key component of any dental practice’s infection prevention procedures. After cleaning instruments to remove any residues or heavy contamination using other tools, such as automatic cleaners, it’s the sterilizer that does the heavy lifting of neutralizing infectious microorganisms and readying instruments for recirculation.
With Infection Control Awareness Month around the corner, it’s worth taking some time to think about your sterilizer. Are you using it properly? And most importantly, how can you tell?
What Should Be Sterilized?
The US Centers for Disease Control and Prevention (CDC) groups patient-care items into three categories:
- Critical items that penetrate soft tissue, such as surgical instruments and periodontal scalers.
- Semicritical items that contact mucous membranes or non-intact skin, such as dental mouth mirrors and dental handpieces.
- Noncritical items that only contact intact skin, such as radiograph cones and blood pressure cuffs.
Critical items should always be sterilized, the CDC says. Semicritical items should as well, provided they are heat tolerant. If they aren’t, the CDC recommends replacing them with heat tolerant or disposable alternatives.
The CDC also notes that dental handpieces, while considered semicritical, can become contaminated with patient materials during use. Therefore, they should always be sterilized after each use.
All this is to say, your practice’s sterilizer should be big enough and efficient enough to handle all the critical and semicritical instruments your practice uses on a daily basis without causing backups or risking incomplete sterilization. It’s also important to plan for the future. Can your sterilizer accommodate additional instruments as your practice grows? Will it be suitable for cassettes if your practice is not already using an Instrument Management System (IMS™)?
How Does Sterilization Work?

Sterilizers use one of three agents to kill microorganisms: steam, unsaturated chemical vapor, or dry heat.
Steam sterilizers, also known as autoclaves, are by far the most common. The CDC says steam sterilization is “dependable and economical” and suitable for sterilizing critical and semicritical items that aren’t sensitive to heat and moisture.
Autoclaves kill bacteria and other organic material by exposing it directly to steam at a certain temperature and pressure for a certain amount of time. Specifically, the CDC says, moist heat kills “by the irreversible coagulation and denaturation of enzymes and structural proteins.”
If any of the three parameters – steam, temperature, or time – is off, an autoclave may fail to eradicate biological contamination. If the steam doesn’t contact all parts of an instrument, microorganisms may escape unscathed. If the steam is not hot enough, its lethal effect will be weakened. And if the steam doesn’t linger long enough, some contaminants may survive the ordeal.
What Can Cause a Sterilizer to Fail?
To keep your sterilizer in top working condition, always make sure your sterilizer is maintained according to the manufacturer’s recommended schedule and keep detailed records of this maintenance on file.
However, assuming there are no mechanical problems, your sterilizer may still fail to neutralize all biological material. According to the CDC, the most common causes of sterilization failure include:
- Improper cleaning of instruments. Debris stuck on your instruments may prevent steam or other sterilizing agents from reaching the surface of the instruments. For a primer on cleaning instruments, review this related blog post.
- Improper or excessive packaging. If you package your instruments with the wrong type of material or with too much material, steam or chemical agents may not be able to penetrate through to the instruments inside. It is important to utilize sterilization packaging that is validated for use with the type of sterilizer you are using, i.e. steam. Hu‑Friedy’s sterilization wraps or pouches are penetrable by steam yet can withstand the rigors of the autoclave.
- Overloading or improper loading. When instruments or cassettes are jammed together tightly inside a sterilizer, they may block the sterilizing agent from reaching every surface of your instruments, causing instruments to not become sterile. It is important to follow the manufacturer’s recommendations for both the sterilizer and sterilization packaging for proper instrument loading.
Clearly, instrument sterilization is a complex process – and in a busy practice, this complexity makes it far too easy to make an innocent mistake that can potentially put the health of both staff and patients at risk. That’s where monitoring and testing comes into play.
How Do You Test Your Sterilizer?
The CDC recommends monitoring sterilization procedures with three techniques:
1. Biological indicators
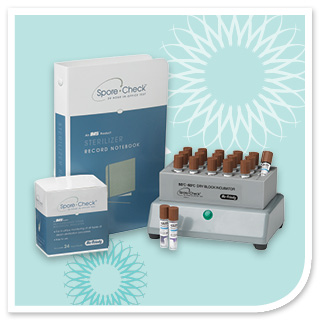
Use spore tests on a weekly basis to test if your sterilizer is killing known highly resistant microorganisms, such as Geobacillus or Bacillus species. This can be done using either strips or vials.
Many practices use a mail-in service for spore testing, but this can be a slow process when accounting for the time needed to ship and process the testing strips. Tests can also be damaged in the mail, leading to inaccurate results. Alternatively, in-office systems – such as Hu‑Friedy’s SporeCheck 24 Hour In-Office Test™ – allow practices to conduct spore testing more conveniently and quickly in office. A failed test (i.e., positive result) can be detected in as little as 2.5 hours, in which case the sterilizer should be taken out of service immediately.
Biological monitoring is the most widely accepted monitoring method, but because it’s only done weekly, mechanical and chemical indicators should also be assessed.
2. Mechanical indicators
During each cycle that is run, check the mechanical components of the sterilizer itself, including sterilizer gauges and computer displays or printouts, to verify that the pressure, temperature, and exposure time reaches the levels recommended by the sterilizer manufacturer for the cycle that has been run.
3. Chemical indicators:
Chemical indicators use sensitive chemicals to assess the physical conditions (e.g. time and temperature) of sterilization. Every pack that is sterilized should include an internal chemical indicator such as tapes, strips, or tabs to make sure the sterilizing agent has penetrated the package and reached the instruments inside. If the internal indicator is not visible from the outside, an exterior chemical indicator must also be placed on the package, in order to easily identify processed from unprocessed packs. Both external and internal chemical indicators should be examined prior to using the instruments to ensure they have changed properly. While chemical indicators do not prove sterilization has been achieved, they allow detection of certain equipment malfunctions and can help identify procedural errors.
While different types of chemical indicators monitor different variables, some – like Hu‑Friedy Steam Sterilization Integrators – react to all three: time, temperature, and steam.
Is Your Sterilizer Functioning Properly? Find Out Now
It’s important to note that all three types of monitoring are critical and required for an effective sterilization process. Biological monitoring is the most thorough, as it tests the sterilization process directly. However, mechanical and chemical monitoring provide useful information in order to assess the effectiveness of sterilization on a per load and per pack basis.
Ultimately, a sterilizer is a precision piece of equipment that serves a critical function within the sterilization center. Is yours up to the task? If you’re not sure, the GreenLight Dental Compliance Center™ by Hu‑Friedy is a great resource to develop and review guidelines on proper sterilizer use, along with the other components of a compliant infection prevention protocol.